Introduction to Transport Layer Security (TLS)
TLS is a protocol based on TCP and serves the application layer. Its predecessor is the Secure Socket Layer (SSL) protocol. Through the TLS protocol, the packets of the application layer can be encrypted and delivered to the TCP layer for transmission.
1. What does TLS do?
The TLS protocol mainly solves the following three network problems:
-
Guarantee data confidentiality. All data is transmitted encrypted to ensure protection against unauthorised access or data theft by third parties.
-
Guarantee data integrity. All data is protected by a verification mechanism, so any tampering will be immediately detected by both parties involved in the communication.
-
Guarantee the authentication and identity verification of both parties involved in data communication. Certificate authentication can be employed by both parties in the communication to ensure the legitimacy of their identities.
2. How does TLS work?
The TLS protocol can be divided into two parts. The record layer uses the key negotiated by the client and the server to encrypt and transmit data. The handshake layer negotiates between the client and the server to determine a set of key strings for data transmission encryption. The TLS protocol model is shown in Figure 8.13, where the handshake layer includes four sub-protocols: handshake protocol, change cipher spec protocol, application data protocol, and alert protocol.
Record layer is responsible for all the underlying data exchanged at the transport layer and can encrypt data. Each TLS record begins with a short header, which includes the Content Type (or subprotocol), Protocol Version, and Length fields. The underlying data is segmented (or merged), compressed, added with a message authentication code, encrypted, and then converted into the data part of the TLS record. Figure 8.14 shows the structure of a TLS record packet.
Handshake layer has four sub-protocols, which are introduced in the list below.
Handshake protocol
Responsible for generating the shared key required for the communication process and performing identity authentication. Note that the handshake protocol does not use cipher suites directly. Instead, it relies on public key cryptography or Diffie-Hellman key exchange to establish secure communication and prevent data from being eavesdropped or intercepted.
Change cipher spec protocol
Responsible for the synchronisation of password switching, and is used after the handshake protocol. During the handshake process, the 'null' cipher suite, which means no encryption, is used. After the handshake is completed, the negotiated cipher suite is used for securing the subsequent data transfer.
Application data protocol
Used by the communicating parties for data transmission. The transmission process is carried out through the application data protocol and TLS record protocol of the handshake layer.
Alert protocol
Used to notify the other party when an error occurs, such as an exception during the handshake process, a message authentication code error, or data that cannot be decompressed.
The algorithm used during TLS encryption is introduced in the list below.
- Hash function verifies data integrity. Common encryption algorithms include MD5, SHA, etc.
- Symmetric encryption algorithm encrypts the application data. Common encryption algorithms include AES, RC4, DES, etc.
- Asymmetric encryption algorithm for identity authentication and key agreement. Common encryption algorithms include RSA, DH, etc.
When using TLS, the client and server use asymmetric encryption algorithm to authenticate identity and negotiate the key of symmetric encryption algorithm, and then use symmetric encrypted data and data digest for data communication. Figure 8.15 shows the TLS handshake process.
-
Client Hello. The client sends the highest version of the supported TLS protocol and all the cipher suites it supports, which are used to send information such as the random number for generating the session key to the server.
-
Server Hello. After receiving the Client Hello message sent by the client, the server selects the TLS protocol version and a cipher suite according to the protocol version and cipher suite sent by the client, and returns them to the client.
-
(Optional) Send Certificate. The server sends its own server-side certificate to the client, which is used by the client to verify the legitimacy of the server.
-
(Optional) Request Certificate. When the server needs to verify the client's certificate, the server will send a certificate request message to the client if mutual authentication is selected.
-
Server Hello Done. The server informs the client that the server has sent all the handshake messages, and the server will wait for the client to send messages.
-
(Optional) Response Certificate. If mutual authentication is selected, the client will send its certificate to the server. Then the server will verify the identity of the client.
-
Client Key Exchange. The client uses the server's public key to encrypt the client's public key and key seed before sending them to the server.
-
(Optional) Certificate Verify. If mutual authentication is selected, the client uses the local private key to generate a digital signature and sends it to the server for authentication through the received client public key.
-
Create Secret Key. The communicating parties generate the communication key based on information such as the key seed.
-
Change Cipher Spec. The client notifies the server that the communication method has been switched to encrypted mode.
-
Finished. The client is ready for encrypted communication.
-
Change Cipher Spec. The server notifies the client that the communication method has been switched to the encrypted mode.
-
Finished. Prepare for encrypted communication on the server side.
-
Encrypted/Decrypted Data. Both parties use the client key to encrypt/decrypt the communication content through a symmetric encryption algorithm.
-
Closed Connection. After the communication is over, either party sends a message to disconnect the TLS connection.
3. Creating an HTTP+TLS server with ESP-IDF
HTTPS, namely HTTP over SSL, encrypts HTTP data through the SSL or TLS
protocol. Compared with HTTP, HTTPS can prevent data from being stolen
or changed during transmission, thus ensuring data integrity. Section
8.3.2 introduces how to use ESP-IDF to create an HTTP server. In fact,
creating an HTTPS server is similar. Call httpd_ssl_start() to start
the HTTP+TLS service, and call httpd_register_uri_handler() to
register the corresponding callback function.
📝 Source code
For the source code of functions
httpd_ssl_start()andhttpd_register_uri_handler(), please refer tobook-esp32c3-iot-projects/test_case/https_server.
static esperr_t root_get_handler(httpd_req_t *req)
{
    httpd_resp_set_type(req, "text/html");
    httpd_resp_send(req, "<h1>Hello Secure World! </h1>", HTTPD_RESP_USE_STRLEN);
    return ESP_OK;
}

static const httpd_uri_t root = {
    .uri       = "/",
    .method = HTTP_GET,
    .handler   = root_get_handler
};

esp_err_t esp_create_https_server(void)
{
    httpd_handle_t server = NULL;
    ESP_LOGI(TAG, "Starting server");
    httpd_ssl_config_t conf = HTTPD_SSL_CONFIG_DEFAULT();
    //Configure CA certificate and private key for the server
    extern const unsigned char cacert_pem_start[] asm("_binary_cacert_pem_start");
    extern const unsigned char cacert_pem_end[] asm("_binary_cacert_pem_end");
    conf.cacert_pem = cacert_pem_start;
    conf.cacert_len = cacert_pem_end - cacert_pem_start;
    extern const unsigned char prvtkey_pem_start[] asm("_binary_prvtkey_pem_start");
    extern const unsigned char prvtkey_pem_end[] asm("_binary_prvtkey_pem_end");
    conf.prvtkey_pem = prvtkey_pem_start;
    conf.prvtkey_len = prvtkey_pem_end - prvtkey_pem_start;
    //Start the HTTP+TLS server
    esp_err_t ret = httpd_ssl_start(&server, &conf);
    if (ESP_OK ! = ret) {
        ESP_LOGI(TAG, "Error starting server!" );
        return ESP_FAIL;
    }
    //Set URI callback function
    ESP_LOGI(TAG, "Registering URI handlers");
    httpd_register_uri_handler(server, &root);
    return ESP_OK;
}
The above code provides an example of how to create an HTTPS server.
Before using this code, please manually create a CA certificate and a
private key in the main directory using the following command:
$ openssl req -newkey rsa:2048 -nodes -keyout prvtkey.pem -x509 -days 3650 -out cacert.pem -subj "/CN=ESP32 HTTPS server example"
Then modify the MakeLists.txt file to compile the certificate into the
code.
idf_component_register(SRCS "station_example_main.c" INCLUDE_DIRS "."
                      EMBED_TXTFILES "cacert.pem" "prvtkey.pem")
In addition, you also need to go to idf.py menuconfig → Component config → ESP HTTPS server, and configure CONFIG_ESP_HTTPS_SERVER_ENABLE.
Enter https://[your device IP]:443/ in the Chrome browser. The CA
certificate on the server side is not issued by a certification
authority, thus it is not trusted. Therefore, you will see the screen
shown in Figure 8.16.
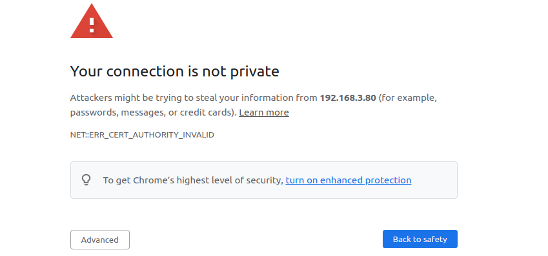
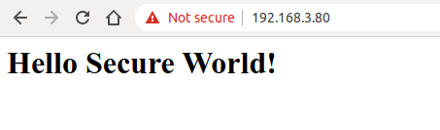
Users need to click the "Advanced" button to allow this untrusted connection. Figure 8.17 shows the interface of a successful HTTPS connection.
Should you encounter a "Header fields are too long for server to interpret" message, just go to idf.py menuconfig → Component config → HTTP Server → Max HTTP Request Header Length, and increase HTTPD_MAX_REQ_HDR_LEN. Figure 8.18 shows the interface where the HTTPS connection fails.