Account Registration
First, we need to implement the registration of a new account, which will be used to bind the device in subsequent steps and control it remotely. In this project, the account is registered via email address.
There is a toggle button in the registration interface to switch between "SIGN IN" and "SIGN UP". For the SIGN UP interface, there are three input fields: Email, Password, and Confirm Password. The content of the Password and Confirm Password fields can be shown or hidden by toggling their visibility, so that users can check whether they have entered the correct password. The password should contain at least one uppercase letter and a number.
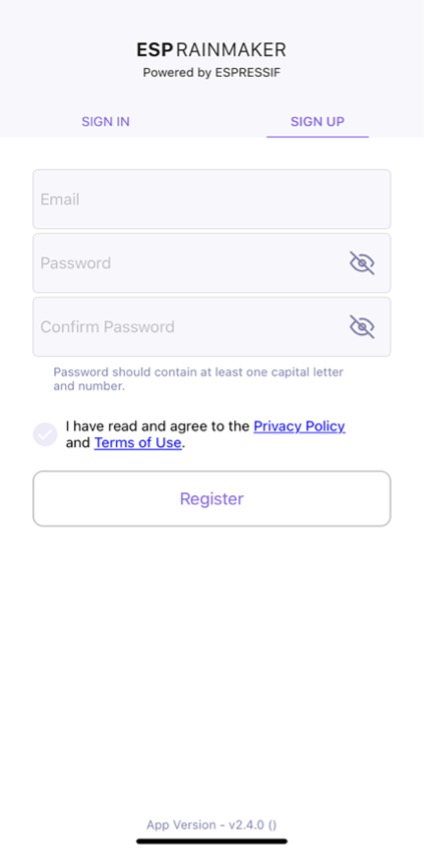
Before clicking "Register", users must read and agree to the Privacy Policy and Terms of Use. Then, it will navigate to a verification interface, and a digital code will be sent to the email address. Users need to enter the correct digital code to complete the registration procedure. The SIGN UP interface is shown in Figure 10.18.
Figure 10.19 demonstrates the API for account registration. For detailed information, please refer to https://swaggerapis.rainmaker.espressif.com/#/User/usercreation.

The account registration function is implemented as follows:
Create a new account.
Below shows the account registration API, where user_name refers to the email address used for registration, and password to the password.
POST /v1/user
Content-Type: application/json

{
    "user_name": "username@domain.com",
    "password": "password"
}
To create a new account in Android, use:
@POST
Call<ResponseBody> createUser(@Url String url, @Body JsonObject body);
📝 Source code
For the source code of creating a new account in Android, please refer to
book-esp32c3-iot-projects/phone_app/app_android/app/src/main/java/com/espressif/cloudapi/ApiInterface.java.
To create a new account in iOS, use:
func createNewUser(name: String, password: String) {
    apiWorker.callAPI(endPoint: .createNewUser(url: self.url, name: name,
            password: password), encoding: JSONEncoding.default) { data, error in
        self.apiParser.parseResponse(data, withError: error) { umError in
            self.presenter?.verifyUser(withName: name, andPassword:

}
📝 Source code
For the source code of creating a new account in iOS, please refer to
book-esp32c3-iot-projects/phone_app/app_ios/ESPRainMaker/ESPRainMaker/UserManagement/Interactors/ESPCreateUserService.swift.
Verify the account after receiving the digital code.
Below shows details of the API, where user_name refers to the email address used for registration, and verification_code to the digital code.
POST /v1/user
Content-Type: application/json

{
    "user_name": "username@domain.com",
    "verification_code": "verification_code"
}
To verify the account with digital code in Android, use:
@POST
Call<ResponseBody> confirmUser(@Url String url, @Body JsonObject body);
📝 Source code
For the source code of verifying the account in Android, please refer to
book-esp32c3-iot-projects/phone_app/app_android/app/src/main/java/com/espressif/cloudapi/ApiInterface.java.
To verify the account with digital code in iOS, use:
func confirmUser(name: String, verificationCode: String) {
    apiWorker.callAPI(endPoint: .confirmUser(url: self.url, name: name,
                        verificationCode: verificationCode),
                        encoding: JSONEncoding.default) { data, error in
        self.apiParser.parseResponse(data, withError: error) { umError in
            self.presenter?.userVerified(withError: umError)
        }
    }
}
📝 Source code
For the source code of verifying the account in iOS, please refer to
book-esp32c3-iot-projects/phone_app/app_ios/ESPRainMaker/ESPRainMaker/UserManagement/Interactors/ESPCreateUserService.swift.